
If you administer Windows endpoints in 2026, "Secure Boot is on" is no longer a sufficient answer. Auditors, insurers, and frameworks like CIS, NIST 800-171 and the Microsoft Secured-core PC program all want evidence: which keys are loaded, when the dbx revocation list was last updated, whether the TPM is ready, whether BitLocker is actually protecting your volumes. And they want it from every machine, not just the one in front of you.
The good news: every piece of that evidence is available from PowerShell. The cmdlets are built in (Confirm-SecureBootUEFI, Get-SecureBootUEFI, Get-Tpm, Get-BitLockerVolume) and you do not need any third-party agent to read them. The bad news: nobody puts the pieces together for you. This guide does.
By the end you will have:
- A solid mental model of how Secure Boot, the UEFI key store and TPM measured boot fit together
- Working PowerShell snippets to audit each layer
- A simple PASS / WARN / FAIL scoring rule you can defend
- A reusable PowerShell module — Dargslan.WinSecureBootAudit — that produces a ready-to-email HTML report
- A free PDF cheat sheet with the entire workflow on a single page
Table of Contents
- Why audit Secure Boot at all?
- How Secure Boot, UEFI and TPM fit together
- Prerequisites
- Step 1: Confirm the firmware is UEFI
- Step 2: Confirm Secure Boot is enabled
- Step 3: Inspect the UEFI key store (PK, KEK, db, dbx)
- The dbx revocation list — the hidden compliance gap
- Step 4: Audit the TPM
- Step 5: Audit BitLocker volumes
- A defensible PASS / WARN / FAIL score
- Generating an HTML report your auditors will accept
- Running the audit across the fleet
- Dargslan.WinSecureBootAudit module
- Common errors and how to fix them
- Free cheat sheet
- FAQ
Why audit Secure Boot at all?
Secure Boot is a firmware-level promise: only software signed by a key the firmware trusts will be allowed to load. The promise is real — the implementation is fragile. A machine ships from the factory with Secure Boot on and the Microsoft KEK present, and three years later the same machine can be in Setup Mode because a technician cleared the PK to dual-boot Linux, or has an outdated dbx that does not include the BlackLotus revocations from 2023, or has a TPM that is "present" but not "ready" because nobody ever provisioned ownership.
None of those problems show up in a "Secure Boot is on" green checkmark. They show up only when you read the actual UEFI variables and TPM state from PowerShell. That is the gap a real audit closes.
From a compliance angle the picture is the same. CIS Microsoft Windows 10 / 11 benchmark 18.9.x, NIST 800-171 control 3.4.5, and the Microsoft Secured-core PC requirements all expect evidence that Secure Boot is enabled and the key store is in a known-good state. Producing that evidence by hand on every endpoint is unrealistic. Producing it from a 30-line PowerShell script is trivial.
How Secure Boot, UEFI and TPM fit together
Three independent technologies are at play here. They are easy to confuse, so it is worth spending a paragraph on each.
Secure Boot is a UEFI feature. When the firmware loads the bootloader, it verifies that the bootloader is signed by a key whose certificate chains back to a key in the UEFI db (allowed signature database). If the chain is broken or the bootloader hash appears in dbx (forbidden database), the firmware refuses to launch it and the machine drops to a recovery prompt.
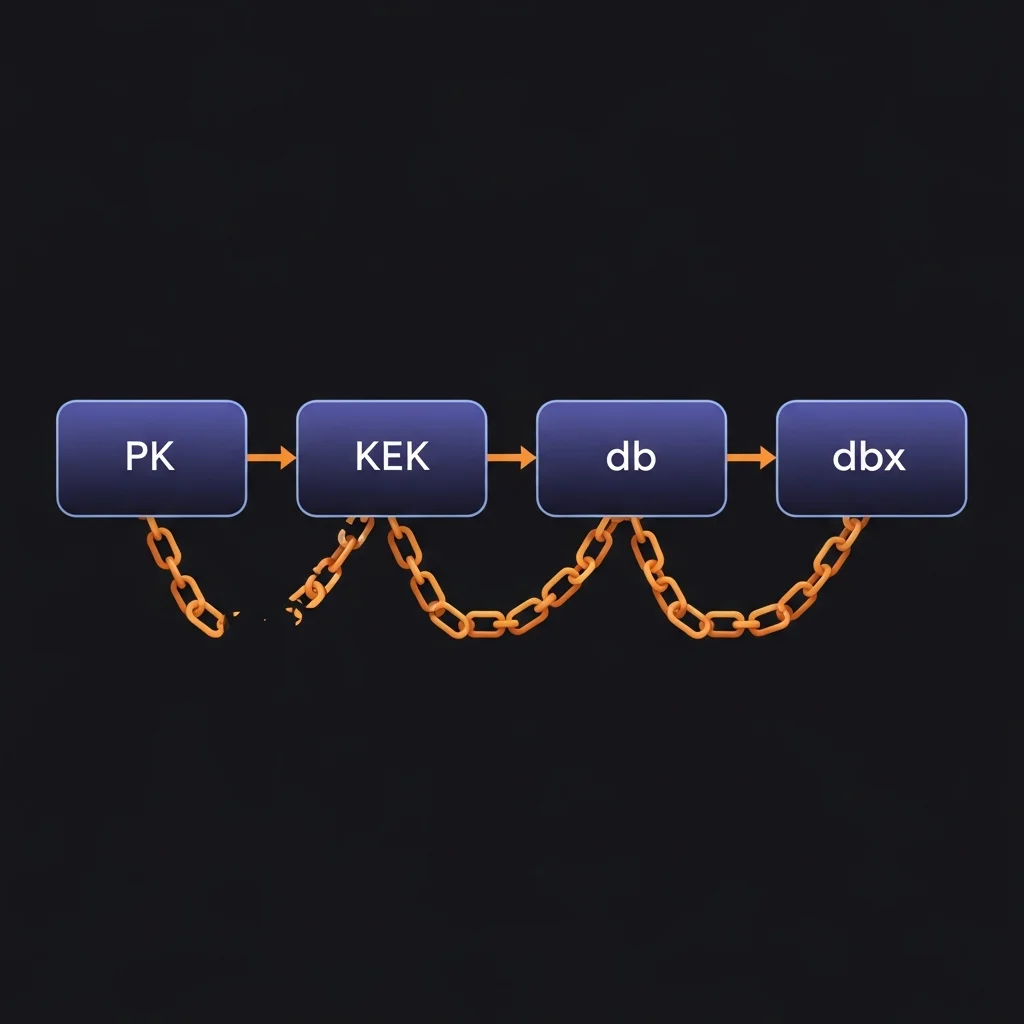
The UEFI key store is the set of certificates and hashes the firmware uses for that decision. It has four layers:
- PK (Platform Key) — exactly one key, set by the OEM. Owns the platform. Removing it puts the machine into Setup Mode.
- KEK (Key Exchange Key) — keys that are allowed to update db and dbx. On most consumer hardware this contains the Microsoft Corporation KEK CA.
- db — the allow-list. Contains the Microsoft Windows Production CA (for Windows bootloaders) and usually the Microsoft Corporation UEFI CA (for third-party shims).
- dbx — the deny-list. Contains hashes of revoked bootloaders. This is the variable that grows over time as Microsoft pushes revocation updates for things like BlackLotus.
The TPM (Trusted Platform Module) is independent of Secure Boot. It is a small chip (or, on modern Intel CPUs, a firmware feature called PTT) that measures the boot chain into PCR registers and provides cryptographic operations to BitLocker, Windows Hello and Defender Credential Guard. Secure Boot decides whether code is allowed to run; the TPM records what ran. Both are required for a defensible chain of trust.
BitLocker sits on top of the TPM. It seals the volume encryption key to a set of PCR values. If the boot chain measurements change unexpectedly, the TPM refuses to release the key and BitLocker drops to recovery — which is exactly the behaviour that protects you from offline-attack scenarios.
An audit needs to confirm all four layers. We will go through them one at a time.
Prerequisites
Everything in this guide works on:
- Windows 10 / 11 (Pro, Enterprise, Education)
- Windows Server 2016 / 2019 / 2022 / 2025
- PowerShell 5.1 or PowerShell 7+
- UEFI firmware in UEFI mode (not Legacy / CSM)
For TPM and BitLocker visibility you need administrator rights. Secure Boot status alone can be read as a normal user.
None of the cmdlets used here require any add-on module — they are all built into Windows.
Step 1: Confirm the firmware is UEFI
If the machine is in Legacy / CSM mode, Secure Boot is irrelevant — there is nothing to audit. Always check this first:
$fw = (Get-ComputerInfo -Property BiosFirmwareType).BiosFirmwareType
if ($fw -ne 'Uefi') {
    Write-Warning "System is in $fw mode - Secure Boot does not apply."
    return
}
You can also read this from $env:firmware_type in some environments, but Get-ComputerInfo is reliable and supported across versions.
Step 2: Confirm Secure Boot is enabled
The simplest possible check is built into Windows:
Confirm-SecureBootUEFI
# True  = Secure Boot enforcement is on
# False = Setup Mode or disabled
That single boolean is all most people ever check. It is not enough. Two UEFI variables sit alongside it and tell you whether the firmware is in a state where Secure Boot can even be enforced:
$setup = (Get-SecureBootUEFI -Name SetupMode).Bytes[0]
$audit = (Get-SecureBootUEFI -Name AuditMode).Bytes[0]
"SetupMode = $setup, AuditMode = $audit"
SetupMode = 1— the platform has no PK. Secure Boot is effectively off no matter whatConfirm-SecureBootUEFIsays.AuditMode = 1— the firmware is logging what would have failed but not enforcing. A development setting that should never appear in production.
Either of those should fail your audit immediately.
Step 3: Inspect the UEFI key store (PK, KEK, db, dbx)
Get-SecureBootUEFI can read each of the four key stores by name. The result is a binary blob; what you usually want from an audit perspective is "is it present at all" and "how big is it":
foreach ($name in 'PK','KEK','db','dbx') {
    try {
        $v = Get-SecureBootUEFI -Name $name -ErrorAction Stop
        [pscustomobject]@{
            Name      = $name
            Present   = $true
            SizeBytes = $v.Bytes.Length
        }
    } catch {
        [pscustomobject]@{ Name = $name; Present = $false; SizeBytes = 0 }
    }
}
What "good" looks like:
- PK — present and a few hundred bytes. Missing means Setup Mode.
- KEK — present, ~1.5 KB on stock Windows machines. Should contain at least the Microsoft Corporation KEK CA 2011 (and on newer hardware the 2023 KEK CA).
- db — present, ~3 KB on stock machines. Contains Microsoft Windows Production PCA 2011 + Microsoft UEFI CA 2011, plus newer 2023 CAs on Secured-core PCs.
- dbx — present and at least 8-10 KB. A small dbx is a red flag — it usually means the machine has not received any revocation updates.
The dbx revocation list — the hidden compliance gap
Of all four key stores, dbx is the one that breaks audits in 2026. The list is supposed to grow over time as Microsoft pushes revocation updates through Windows Update. Real-world examples include the BlackLotus UEFI bootkit (2023), the GRUB BootHole revocations, and a long tail of vendor-specific shims that turned out to be exploitable.
If you read dbx on a machine that has not received an update for a year, it will be small and missing the BlackLotus signatures. That same machine will technically pass Confirm-SecureBootUEFI = True but it will accept a known-malicious bootloader. That is the exact scenario auditors are now asking about.
A pragmatic check:
$dbx = Get-SecureBootUEFI -Name dbx
if ($dbx.Bytes.Length -lt 1024) {
    Write-Warning "dbx is suspiciously small ($($dbx.Bytes.Length) bytes) - revocation list may be stale."
}
1 KB is a conservative floor; modern machines that have applied updates typically show 10-40 KB. Your bar can be higher; any bar is better than no bar.
Step 4: Audit the TPM
BitLocker, Windows Hello and Defender Credential Guard all anchor to the TPM. The cmdlet is straightforward:
$tpm = Get-Tpm
[pscustomobject]@{
    Present     = $tpm.TpmPresent
    Ready       = $tpm.TpmReady
    Enabled     = $tpm.TpmEnabled
    Activated   = $tpm.TpmActivated
    Owned       = $tpm.TpmOwned
    SpecVersion = $tpm.SpecVersion
}
Important distinctions:
- Present — there is a TPM chip or firmware TPM in the system.
- Enabled — turned on in the firmware.
- Activated — the OS can talk to it.
- Owned — Windows has provisioned an owner authorization. Required for many features.
- Ready — all of the above are true. This is the single most important field.
A common state on machines that have been re-imaged is Present = True, Enabled = True, Activated = True, Owned = False, Ready = False. The machine has a TPM but Windows never claimed ownership, so BitLocker cannot use it. Re-running the BitLocker pre-provisioning task or Initialize-Tpm -AllowClear -AllowPhysicalPresence usually fixes it.
Spec version matters too. 2.0 is required for Windows 11. If you see 1.2, the audit should flag the machine as ineligible for current security baselines.
Step 5: Audit BitLocker volumes
The Secure Boot + TPM chain is the foundation; BitLocker is what actually keeps the data confidential at rest. Audit it next:
Get-BitLockerVolume | Select-Object MountPoint,
    ProtectionStatus, EncryptionMethod, VolumeStatus,
    EncryptionPercentage,
    @{N='Protectors';E={ ($_.KeyProtector | ForEach-Object KeyProtectorType) -join ',' }}
Pay attention to:
ProtectionStatus = 1— encryption keys are sealed and the volume is genuinely protected.0means BitLocker is suspended (e.g. for a firmware update) and the key is plaintext on disk.EncryptionMethod— should beXtsAes256on modern systems;Aes128on legacy installs is acceptable but should be flagged for re-encryption.Protectors— must includeTpmfor the OS volume.Tpm,RecoveryPasswordis the standard pair.
If ProtectionStatus = 0 you have a pause that someone forgot to resume, or a known-bad provisioning. Either way, it is not protected.
A defensible PASS / WARN / FAIL score
Auditors do not love arbitrary numbers, but they do appreciate a documented, repeatable scoring rule. Here is one that works in practice:
| Check | Weight | Pass condition |
|---|---|---|
| Secure Boot enabled | 1 | Confirm-SecureBootUEFI = True |
| Platform Key present | 1 | PK exists, SetupMode = 0 |
| dbx revocation list present | 1 | dbx > 1 KB |
| TPM ready | 1 | Get-Tpm.TpmReady = True |
| At least one BitLocker-protected volume | 1 | Any volume with ProtectionStatus = 1 |
Score / verdict mapping:
- 5/5 — PASS — defensible posture, ship the report
- 3-4/5 — WARN — known gap, file remediation ticket
- 0-2/5 — FAIL — block from sensitive workloads
The Dargslan.WinSecureBootAudit module ships exactly this scoring; you can read or modify it in Get-DargslanSecureBootAuditReport.
Generating an HTML report your auditors will accept
Auditors tend to want a single-page artefact they can attach to a control evidence binder. The module's Export-DargslanSecureBootAuditReport writes a styled, dark-themed HTML page with a clear PASS / WARN / FAIL banner, the full UEFI key store breakdown, the TPM table and the BitLocker table:
Import-Module Dargslan.WinSecureBootAudit
Export-DargslanSecureBootAuditReport -Path C:\reports\$(hostname)-secureboot.html
For SIEM ingestion, the JSON form is easier to parse:
Export-DargslanSecureBootAuditReport -Path C:\reports\$(hostname)-secureboot.json -Format Json
Running the audit across the fleet
For more than a handful of machines, do not RDP to each one. Use PowerShell remoting:
$hosts = Get-Content C:\admin\hosts.txt
$results = Invoke-Command -ComputerName $hosts -ScriptBlock {
    Import-Module Dargslan.WinSecureBootAudit
    Get-DargslanSecureBootAuditReport
} -ThrottleLimit 25 -ErrorAction SilentlyContinue

$results | Select-Object PSComputerName, Score, Verdict, @{N='Issues';E={$_.Issues -join '; '}} |
    Export-Csv C:\reports\fleet-secureboot.csv -NoTypeInformation
If your fleet uses Intune, the same module is wired into the existing Intune device management workflow: ship the module to devices via a PowerShell deployment, then schedule the audit nightly and upload the JSON to your log workspace. The module is intentionally side-effect free — running it cannot break Secure Boot or the TPM.
Dargslan.WinSecureBootAudit module
To save you the integration effort, the entire workflow is wrapped in a small PowerShell module published on the PowerShell Gallery:
Install-Module -Name Dargslan.WinSecureBootAudit -Scope CurrentUser
Import-Module Dargslan.WinSecureBootAudit

# Quick interactive view
Get-DargslanSecureBootStatus

# Full audit
Get-DargslanSecureBootAuditReport

# Export
Export-DargslanSecureBootAuditReport -Path C:\reports\sb.html
Source is on GitHub — the module is part of the broader Dargslan Windows Admin Tools suite (over a hundred small, single-purpose modules for everyday Windows administration). Browse the rest at powershellgallery.com/profiles/Dargslan.
Common errors and how to fix them
"Cmdlet not supported on this platform" on Confirm-SecureBootUEFI
The system is in Legacy / CSM mode, not UEFI. Switch to UEFI in the firmware settings (often requires re-installing Windows because the partition layout differs).
Get-Tpm fails with "TPM device not found"
Either the TPM is disabled in the firmware, or the platform is virtualized without a virtual TPM. On Hyper-V you can attach a vTPM with Set-VMSecurity -EnableTrustedPlatformModule $true.
Get-BitLockerVolume fails with "Access is denied"
Run PowerShell elevated. Non-admin users cannot enumerate BitLocker volumes.
SetupMode is 1 but Confirm-SecureBootUEFI returns True
Rare, but happens on systems where the firmware reports Secure Boot active even without a PK. Trust SetupMode — that is the authoritative state. The fix is to re-provision the platform key (typically an OEM tool or "Restore default keys" in the firmware UI).
dbx is exactly 76 bytes
That is the empty-list signature header. The machine has never received a revocation update. Force a Windows Update cycle and re-check.
Download the cheat sheet
The Windows Secure Boot Audit Cheat Sheet (PDF) condenses this entire guide into a printable single-pager: every cmdlet, every key, every PASS condition, every common error. Pin it next to your monitor and you will not have to re-derive any of it.
FAQ
Does this work on Windows Server Core?
Yes. Confirm-SecureBootUEFI, Get-SecureBootUEFI and Get-Tpm are all part of the base Server Core image. Get-BitLockerVolume requires the BitLocker feature to be installed (Install-WindowsFeature BitLocker).
Can I read the actual certificates inside KEK or db, not just the size?
Yes — the byte array is an EFI signature list. Parsing it gives you the issuer name and SHA-256 thumbprint of every certificate. The module ships only the size for now; a future release will expose the parsed contents for forensic-grade audits.
Does enabling Audit Mode break my machine?
No, but it disables Secure Boot enforcement until you switch back. Audit Mode is for development and platform integration testing — it should never be left on in production.
What is the difference between fTPM and dTPM for this audit?
None as far as the cmdlets are concerned. Both expose the TPM 2.0 interface. Firmware TPMs (Intel PTT, AMD fTPM) are slightly more vulnerable to side-channel attacks but functionally equivalent for BitLocker and Windows Hello.
Can I export the report to PDF instead of HTML?
Render the HTML in a headless Chromium and print to PDF — for example with chrome --headless --print-to-pdf. The module's HTML is self-contained CSS so it prints cleanly.
Will this audit pass the Microsoft Secured-core PC requirements?
Secured-core requires more than this — DRTM (System Guard), HVCI, Memory Integrity and Defender Credential Guard. This module covers the Secure Boot / UEFI / TPM / BitLocker layer, which is the foundation. The full Secured-core checklist will be covered in a follow-up post; subscribe to the Dargslan blog to catch it.
Is there an equivalent for Linux Secure Boot?
Yes — the same audit pattern works with mokutil --sb-state, mokutil --list-enrolled, and tpm2_pcrread. We will publish a parallel Linux audit guide and a companion Bash script in the next batch.


